Posts mit dem Label nailart werden angezeigt. Alle Posts anzeigen

Donnerstag, 16. Juli 2015

Dotted Gradient & Ombre Top Coat

Hello Lovelies!

I am back from Austria and I bought new polishes! I will show them to you in a few days when I had a chance to take some pictures. Today I want to show you another gradient manicure wich I totally love lately, but this time it is not a sponged gradient but a dotted one.
As my base for this manicure I used p2 - sashimi ship and added these other p2 shades.
before sunrise - lovely madness - dress + go!
First I made some dots with the larger side of my dotting tool concentrating in the tip area of the nail and then used the smaller side to make little dots and let them fade out going farther down. This creates the gradient and is really easy.
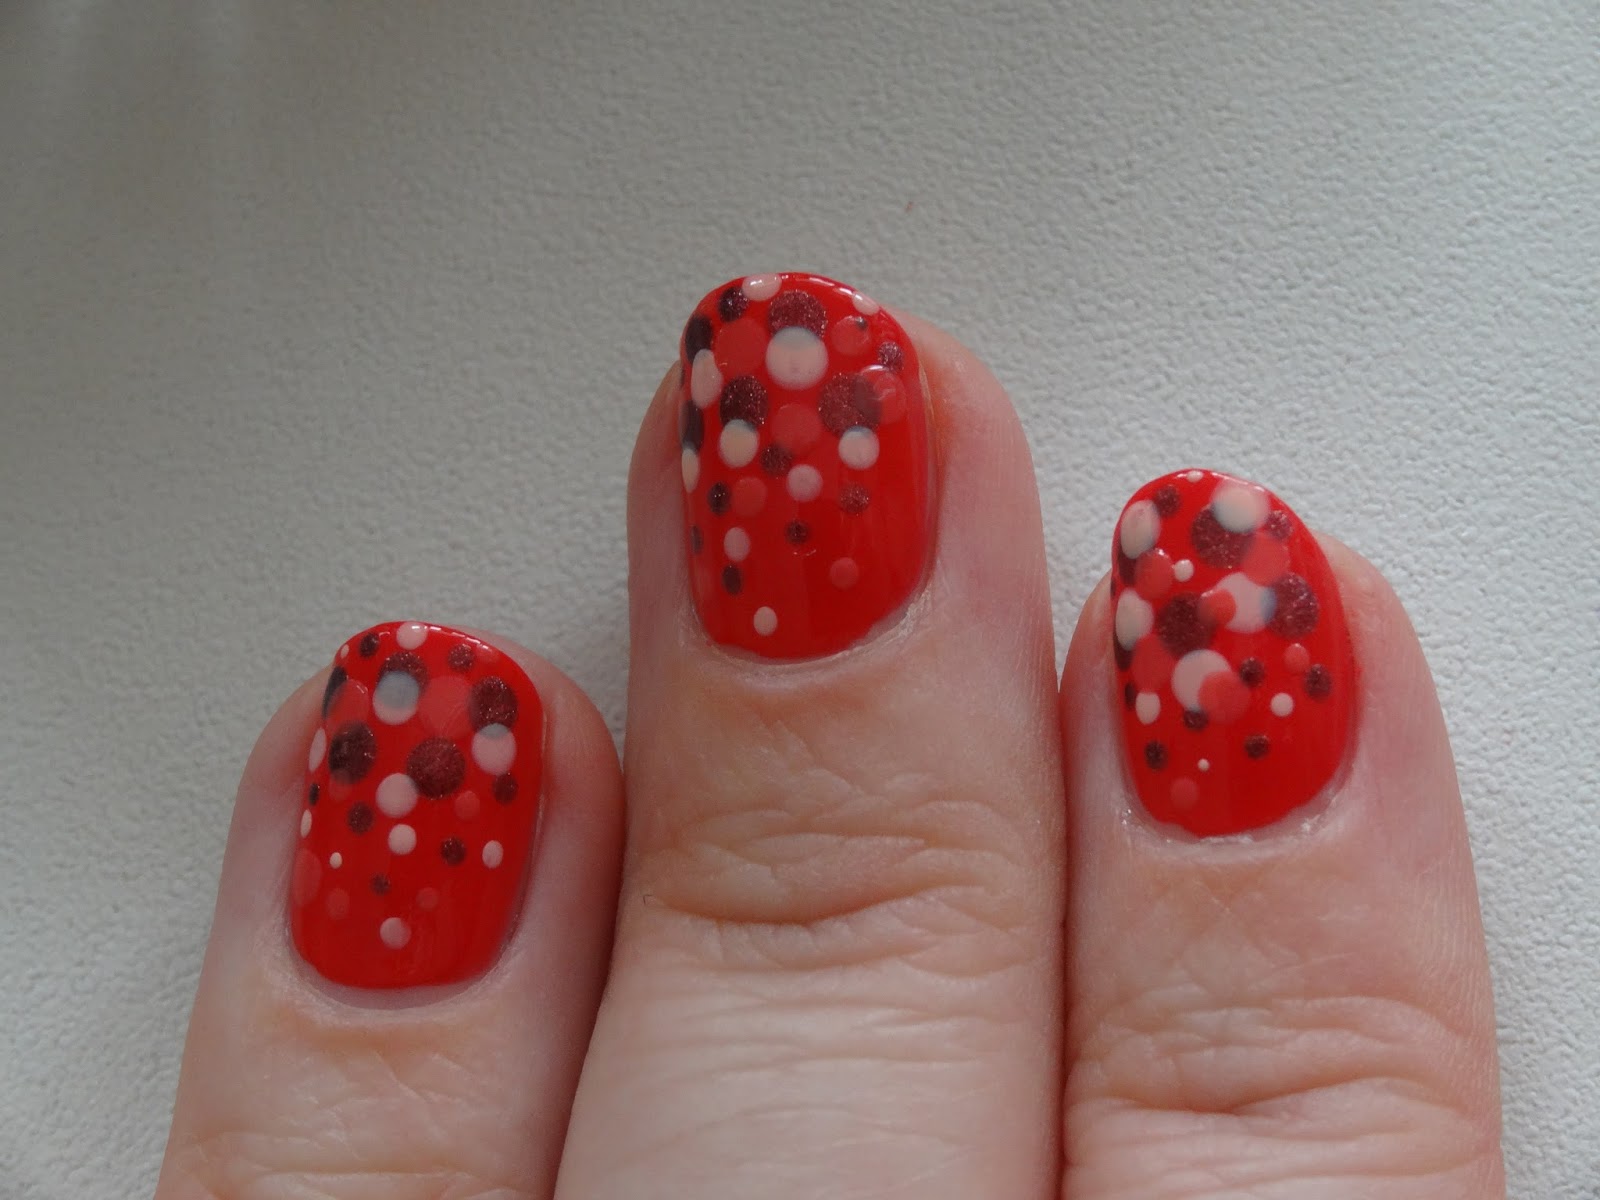
Make sure to let each colour dry a little before applying the next. You want to overlap the dots and they should not get all mixed up.

To blend all my colours together perfectly I added a layer of Seche Vite. I love how glossy the manicure looks now.


I then added the Ombre Top Coat by catrice. But it did not work as well as I was hoping. The colours I used for this manicure are to dark to see the effect properly. If you look closely there is a difference between my thumb (where I did not use the topcoat) and my pinkie (with four layers of the top coat). My pinkie is darker. This is manily visible on the rosy dots of lovely madness.
This topcoat actually is a cool way to do an ombre manicure, but you have to use pastel colours in order for it to show the best results.
Left: indoors with a flash. - Right: outdoors in natural light, no flash.

In my opinion this is a fun and super easy way to make gradient nails and it is a good alternative to a sponged manicure especially for shorter nails where sponging can be quite messy.

I hope you like this manicure! Have you ever done a dotted gradient?


You may also like:

Freitag, 19. Juni 2015

essence - color & go - candy love

Hello Sweeties!

Happy Friday everyone! Today I want to show you a pretty essence polish by the name candy love (167).
Candy love is a peachy nude creme polish with a touch of silver micro glitter in it. The glitter is really hard to see on the nails, especially in the pictures, but in the bottle you can see it quite well. 
The odd thing is, that the glitter is perfectly visible when you apply the polish and it is still wet. Once it starts to dry you have to take a second or even a third close look to see the sparkles. But that is what makes this polish interesting.


The formula of candy love is excellent. With two coats it was perfectly opaque and application was so easy. I love the flat brush that comes with most essence polishes. It makes everything so much easier.
The polish is not really matte or has a satin finish, but it is not very glossy either. It is pretty hard to describe. In these swatches I used a topcoat but it still isn't super shiny. It is the same thing as with the glitter. The polish seems to somehow absorb the glint and shine. (Hope that makes any sense to you!)
As an accent I added four light green rhinestones to my ringfingers.
Candy love is a great polish to wear on its own or with some extra sparkle on top. It also would make a gorgeous base for nailart. I love the peachy undertone. This makes the polish perfect for summer.

Are you a fan of nude polish? Or do you prefer a hot pink?

You may also like:

Dienstag, 9. Juni 2015

Galaxy Nails on Transfer Foil

Hello Beauties!

As promised I want to show you what I did with the manicure I showed you this morning. I did a rainbow galaxy manicure on the transfer foil!

Let me show you what I did. First I ripped a tiny piece of makeup sponge out and applied some white and black polish randomly across my nails. Using a dotting tool and a fine nailart brush, I made some white dots and stars.
To make it a bit sparklier I used china glaze - Techno and made sure I only had very few glitter junks randomly spread across my nails. In this stage you can hardly see how badly I messed up my ringfinger with the foil before! :-D if anything it adds more depth to the manicure.


Since I was not perfectly happy with this yet, I used a pearl shine polish on top of my manicure. One coat of Black Only - 244 (#A0361) was enough to give it a more fading and galaxy-like appearance.


As a final touch I added a rhinestone to each nail and sealed it in with top coat. I really love the result! Do you?
I think the stars are a bit huge, but hey, for a first attempt it is not bad at all.
And here is a picture of all the polishes I used. Most of them were shown in my previous post by name if you are interested.
Have you ever done galaxy nails? Do you like them?

You may also like:

Samstag, 6. Juni 2015

Skittle Manicure

Hello Lovelies!

It is finally getting really hot here in Germany and I am ready to wear bright colours. Today I chose a manicure that I have been wanting to do for a while now but was never in the mood for. A colourful Skittle Manicure.
Most of you probably know the yummie little candies that gave this mani type its name so I won't have to explain that! :-D Here are the colours I chose for the different tastes:
Strawberry: Maybelline Color Show - Power Red
Orange: NYX - Pop Culture
Lemon: Maybelline Color Show - Electric Yellow
Lime: essie - vice versa
Grape: Suzie And The 7 Düsseldorfs (or is it actually black currant?)


For this manicure I used a Maybelline base coat, two coats of china glaze - White On White to make the colours pop and then two coats of each colour. I didn't use a topcoat to show the different finishes of all my polishes. You can best see them in the pictures taken in natural sunlight below. Some are super glossy, others shimmery and almost a bit frosty and the green vice versa has a very soft satin finish.

I think this is such a great manicure for summer! It is fun and it will fit almost every outfit.

Have you ever done a Skittle Manicure? Do you like mine?


You may also like:


Dienstag, 12. Mai 2015

My Mothers Day Nails

Hello Beauties!


As promised I want to show you what I was wearing on my nails for Mothers Day. I was planning to surprise my Mom and go to Austria, but I sprained my ancle on Friday and couldn't make the trip. Instead I stayed in Munich and visited my future mother in law with my fiancée. We had a great time there too, but it is not the same... On to the manicure!
I wanted to do a uni-coloured mix and match manicure and did so by painting two different accent nails.
I started my manicure with two coats of p2 - forever (690) on a Maybelline basecoat. The polish was a dream to apply. The formula is excellent and went on smooth.  
The colour of forever reminds me of the lilac bush in front of my window. Here is a picture:


A rich purplish lilac with a glossy finish. Totally my kind of colour! With NYX - White I dotted on a flower to my ringfingers and placed a baby pink rhinestone in the center. 

With china glaze - Fairy Dust I added some sparkle to my middle fingers.

To seal it all in I used Seche Vite Dry Fast Top Coat. I totally love this combo and simple manicures like that one in general. The colour is amazing and fits my wardrobe perfectly.

How do you like the colour? What did you wear on your nails for Mothers Day?