Posts mit dem Label NYX werden angezeigt. Alle Posts anzeigen

Mittwoch, 29. Juli 2015

kiko 240 - Apple Red & Mickey Mouse Manicure

Hello Loves!

Last week my fianceés niece had her fourth Birthday and I was the designated photographer for the party. First I wanted to do a colourful rainbow water decal manicure for the occasion, but it went all wrong and I had to start over and come up with something new. (I will show you my big fail a bit later.) After twisting my mind for a while and browsing the web I came up with the idea to this Mickey Mouse manicure that was inspired by several pinterest pins.
As a base for my red nails I used kiko - Red Apple (240) wich is a fantastic polish. It is opaque in two coats, dries quickly and applies smoothly. For my white nails I used cartice - Get Boho In SoHo, wich I will show you with my rainbow water decal fail. (Both of these polishes are from my huge Salzburg haul.)
On my index- and pinkiefinger I used NYX - White to make polkadots. Sadly I got some streakes on the indexfinger, but I guess it lookes still okay. On my ringfinger I used a dotting tool and a nail art brush to create the large Mickey Mouse head shape in the corner with s-he stylezone -296.
I then added some black rhinestones to the upper part of that nail to make a small Mickey head and did the same by using different sized clear rhinestones on my middlefinger. My thumb was a bit more tricky, but I managed to draw a decent Minnie Mouse bow. My niece liked it, but she was so busy playing with her friends and opening her presents she didn't really care... :-D But I know what I did and I know you are going to acknowledge my hard work!
So I hope you like my girlie Birthday manicure!

You may also like:

Samstag, 11. Juli 2015

Rainbow Gradient for Christopher Street Day

Hello Lovelies!

Happy Saturday! Do you have any plans for the weekend? I am going to hit the road in a few minutes to go to Austria to celebrate my mum and aunts birthday. I decided to stay there for a couple of days, but don't worry, I have a few blogposts scheduled for that time. So make sure to stop by!
Today is Christopher Street Day here in Munich and therefore I want to show you a colourful rainbow manicure. 
As usual when working with bright colours I started this manicure with a white base - two coats of china glaze - White on White - , and let that dry for a while. To avoid making a mess around my cuticles I taped my fingers with some scotch tape.
Then I sponged on the gradient nail by nail with my make-up sponge. I repeated this step until I was happy with the opacity, wich was about three to four times depending on the colours. For cleanup all I had to do was to remove the tape and it was almost done. There were only a few spots where I had to go in with a flat brush and some polish remover.
To blend the colours together even better I added a layer of china glaze - Fairy Dust. My favourite nail is the indexfinger. I accidentally turned around the sponge and put the colours on to the wrong side. I think in the end this really helped blending them together. You hardly can say where yellow starts and orange ends...
Let me show you the polishes I've used. 
Maybelline - Power Red - Nyx - Pop Culture & My Sunshine - essie - vice versa & mesmerized - Maybelline - Purple Gem. 

As a finishing touch I added a rhinestone in the fitting colour to each nail and sealed it in with Seche Vite Dry Fast Top Coat.
I love how these turned out! Perfect to wear today.

How do you like this manicure? Would you like to recreate it?

You may also like:

Mittwoch, 8. Juli 2015

Glitterbomb Gradient Ombre

Hello Lovelies!

Today it is a bit cooler than it was all last week and I start feeling like a human being again. This post was supposed to be up yesterday, but it was too hot and I couldn't get myself to sit in front of the computer. So let me show you what I did here.
Originally this manicure was supposed to be focussing on my first Color Club polish by the name Blush Crush (1065) that looks like a lovely nude creme inside the bottle. So I started painting my nails and immediately knew it was a jelly. It is so very sheer. I started to build up the coats to get opacity on one nail first because I wanted to know how many it would take. Once I've reached the 4th layer and still could see my nail line I took it off and painted a white base first.
I used one coat of NYX - White followed by two layers of Blush Crush. Although the formula is excellent and easy to spread and apply I am a bit disappointed in this polish. I was hoping for a bit more coverage. I really like the colour in the bottle, but it is hardly visible on the nail. I guess it would be perfect if you are aiming for an all natural look.
That said I took out my box of glitter toppers and decided to go for essence - glitterbomb (10) wich has a softly tinted vintage rose jelly base packed with tiny microglitter and some medium sized hexes in a lovely magenta shade. I only used one coat to get a very good result with a good amount of glitter on the nails.

In natural light and sunshine it is very sparkly and shiny, wich I totally love.
To give my manicure a bit more colour I used two of my OPI sheer tints to create an ombre gradient on top of the glitter. At the tip of my nails I used Don't Violet Me Down and then covered the whole nail with Be Magentale With Me. This worked fantastic and gave me a super easy gradient.

To give it the last touch I topcoated the manicure with Seche Vite and created a little flower with self adhesive rhinestones as an accent on my ringfinger.


I love how easy it is to create an accent with rhinestones. You really don't have to be a gifted nail artist to achieve fantastic results. Be sure to use a very liquid top coat to seal in rhinestones. I found that the thicker ones like Seche Vite tend to cause bubbles around the stones.

I am really happy with this manicure and even my fianceé noticed how fancy they look!

Do you like this manicure too? Isn't this a perfectly easy way to create a gradient?

You may also like:


Montag, 6. Juli 2015

Sunset Gradient

Happy Monday, Beauties!

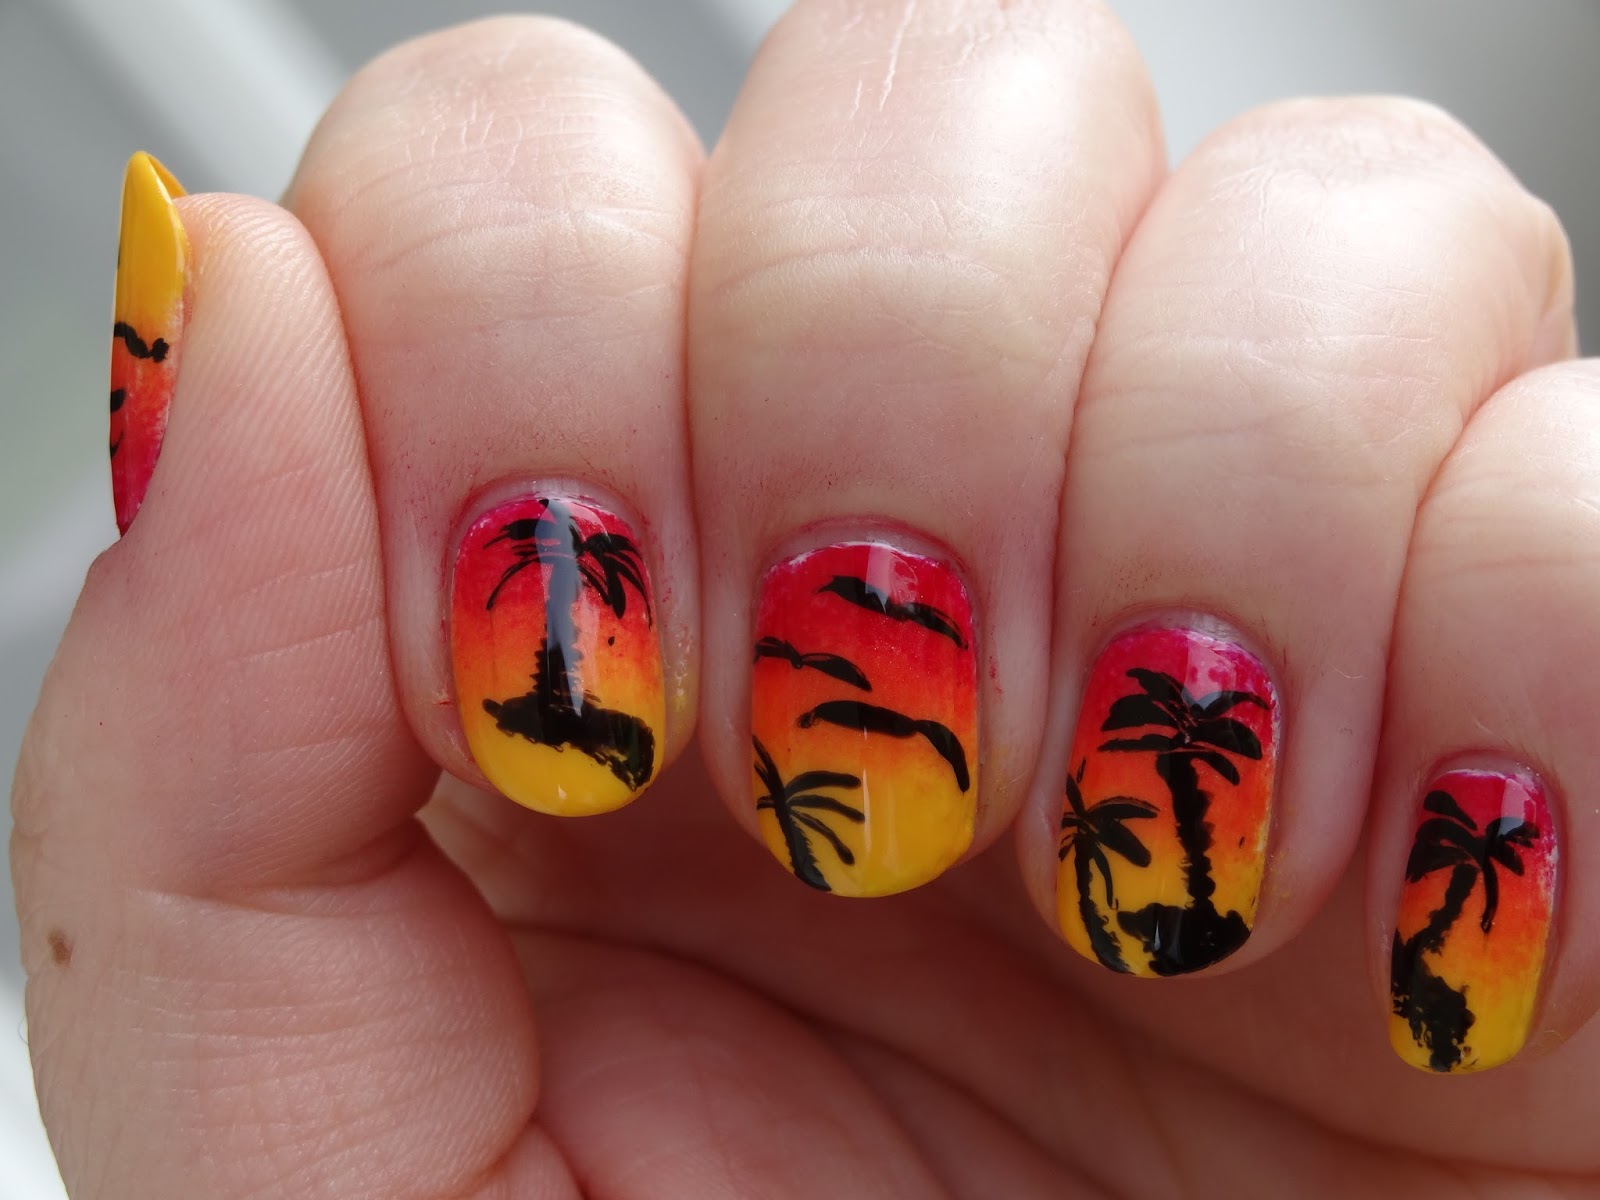
Today I want to show you a sponged gradient with a palm tree design. It totally reminds me of a beach at sunset and was inspired by the hot weather we are experiencing at the moment. All I can think about is lying under a palm tree and jumping into the sea anytime I want to get refreshed. Unfortunately that isn't going to happen right now...
I started this manicure using a base coat and two layers of white polish and let them dry completely. Then I used a make-up sponge to create my gradient using three NYX polishes. My Sunshine (yellow), Pop Culture (orange) and Red Noir (guess what, it is the red one! ;-D). Once I was done with the first layer I wasn't satisfied with the dark red and added Maybelline Express Finish - Cherry (505), wich is a brighter red.


Once the colour was built up to full coverage I cut down a straw to get a C-shaped dotting tool to help create the palm leaves and an ecen smaller section on the other side to create the stems and shadows.
The first nail was a bit challenging, but once you get used to your new tool it is actually very easy. To fill in any gaps I added some doves and then topcoated my manicure with Seche Vite to seal it in.

I think this looks so cute and even better in natural light (below). 


As you know me I can not resist playing around with different top coats and finishes, that is exactly what I did here. I used china glaze fairy dust in my pointer, black only - #244 on my middlefinger (this is a pearl finish) and a matte top coat on my ringfinger. Wich is your favourite?
My favourite for this design was the L'Oreal matte top coat so I added it to all of my nails. The other ones would have been put to better use underneath the black design. They look lovely on the coloured parts, but not on top of the palmtrees.


I hope you like this design as much as I do. It is really fun to do and you should definitely give it a try to work with a cut down straw. 

Have a great week!


You may also like:

Samstag, 6. Juni 2015

Skittle Manicure

Hello Lovelies!

It is finally getting really hot here in Germany and I am ready to wear bright colours. Today I chose a manicure that I have been wanting to do for a while now but was never in the mood for. A colourful Skittle Manicure.
Most of you probably know the yummie little candies that gave this mani type its name so I won't have to explain that! :-D Here are the colours I chose for the different tastes:
Strawberry: Maybelline Color Show - Power Red
Orange: NYX - Pop Culture
Lemon: Maybelline Color Show - Electric Yellow
Lime: essie - vice versa
Grape: Suzie And The 7 Düsseldorfs (or is it actually black currant?)


For this manicure I used a Maybelline base coat, two coats of china glaze - White On White to make the colours pop and then two coats of each colour. I didn't use a topcoat to show the different finishes of all my polishes. You can best see them in the pictures taken in natural sunlight below. Some are super glossy, others shimmery and almost a bit frosty and the green vice versa has a very soft satin finish.

I think this is such a great manicure for summer! It is fun and it will fit almost every outfit.

Have you ever done a Skittle Manicure? Do you like mine?


You may also like: