Posts mit dem Label pink werden angezeigt. Alle Posts anzeigen

Mittwoch, 16. September 2015

kiko - Dark Carmine Red & Aloha Shirt

Hello Sweeties!

I hope you are allright and had a good week so far. Today I want to show you another summer themed manicure that I wore last weekend. It was so warm here I totally felt like it and today it is going to be a sunny day too so I am posting this manicure that reminds me of an Hawaiian shirt.

The base colour I used for this manicure is kiko - Dark Carmine Red (287), a deep, luscious magenta creme polish. In some lighting it looks like a pinkish red, in other more like a dark pink. I would say it is something in between. There is also a little bit of shimmer in this polish. It doesn't sit on top like a pearl finish, but is embedded into the polish like microglitter.
The formula of Dark Carmine Red is excellent. With two coats it is perfectly opaque and it applies smoothly. I didn't do any clean up at this point in my manicure and as you can see there is only a little bit of staining on the sidewall of my ringfinger, no running, pooling or smudging. On its own DCR has a slightly glossy finish, but I would use a topcoat to make it even glossier, because I personally prefer that.
Once that was completely dry I added a layer of Revlon - Holographic Pearls (765) to my ring- and middlefinger. I will tell you a bit more about this polish in one of my next posts. Only so much: It was an odyssey for me to get it!
I then stamped on some hibiscus flowers from my DER-31 plate with white stamping polish. (Check out what's on this plate in my beautiful Purple Gradient with Pansies manicure.)
Initially I only wanted to do my pinkie, but it looked so gorgeous on the magenta base colour, that I had to go on and even add little flower accents to my glitter nails. I am 100% in love with this manicure!
I hope you like it too! Look how sparkly that glitter is! I can not stop looking at these pictures...

Are you a fan of flower nails? How do you like this combination?

You may also like:

Montag, 7. September 2015

Born Pretty Store - Holographics Set

Hello Lovelies!

How was your weekend? Are you ready to start into this new week? A while back I showed you my Born Pretty Store Haul. Unfortunately there were a few items missing. I finally received my set of 12 holographic polishes. They are numbered 1-12.
1 - 2 - 3 - 4 - 5 - 6 - 7 - 8 - 9 - 10 - 11 - 12
The first thing I did was naturally to put them on a display to see how the colours look like. Aren't they gorgeous? I can't wait to try them all. They are so damn sparkly.
Here are some more detailed looks at the bottles:
1 - 2 - 3 - 4
silver - pink - baby pink - red
5 - 6 - 7 - 8
orange - apricot - gold - blue
9 -10 - 11 - 12 
purple - light blue - violet - moss-green


How great are these colours? Do you own any of them? Wich one would you like to see on my nails soon?

You may also like:


Freitag, 4. September 2015

OPI sheer tints Gradient

Hello Beauties!

How was your week? I had a good one. My brother came to visit and we had a good time. I really enjoyed having him and his girlfriend around. Unfortunately I hurt my ankle yesterday. I missed a little step and twisted my foot. Now I can barely step on it so I am sitting on the sofa with a big pillow underneath my leg... Perfect timing for the weekend! :-(
Nevertheless I have a super easy and gorgeous manicure to share with you. Let me show you how I did it.
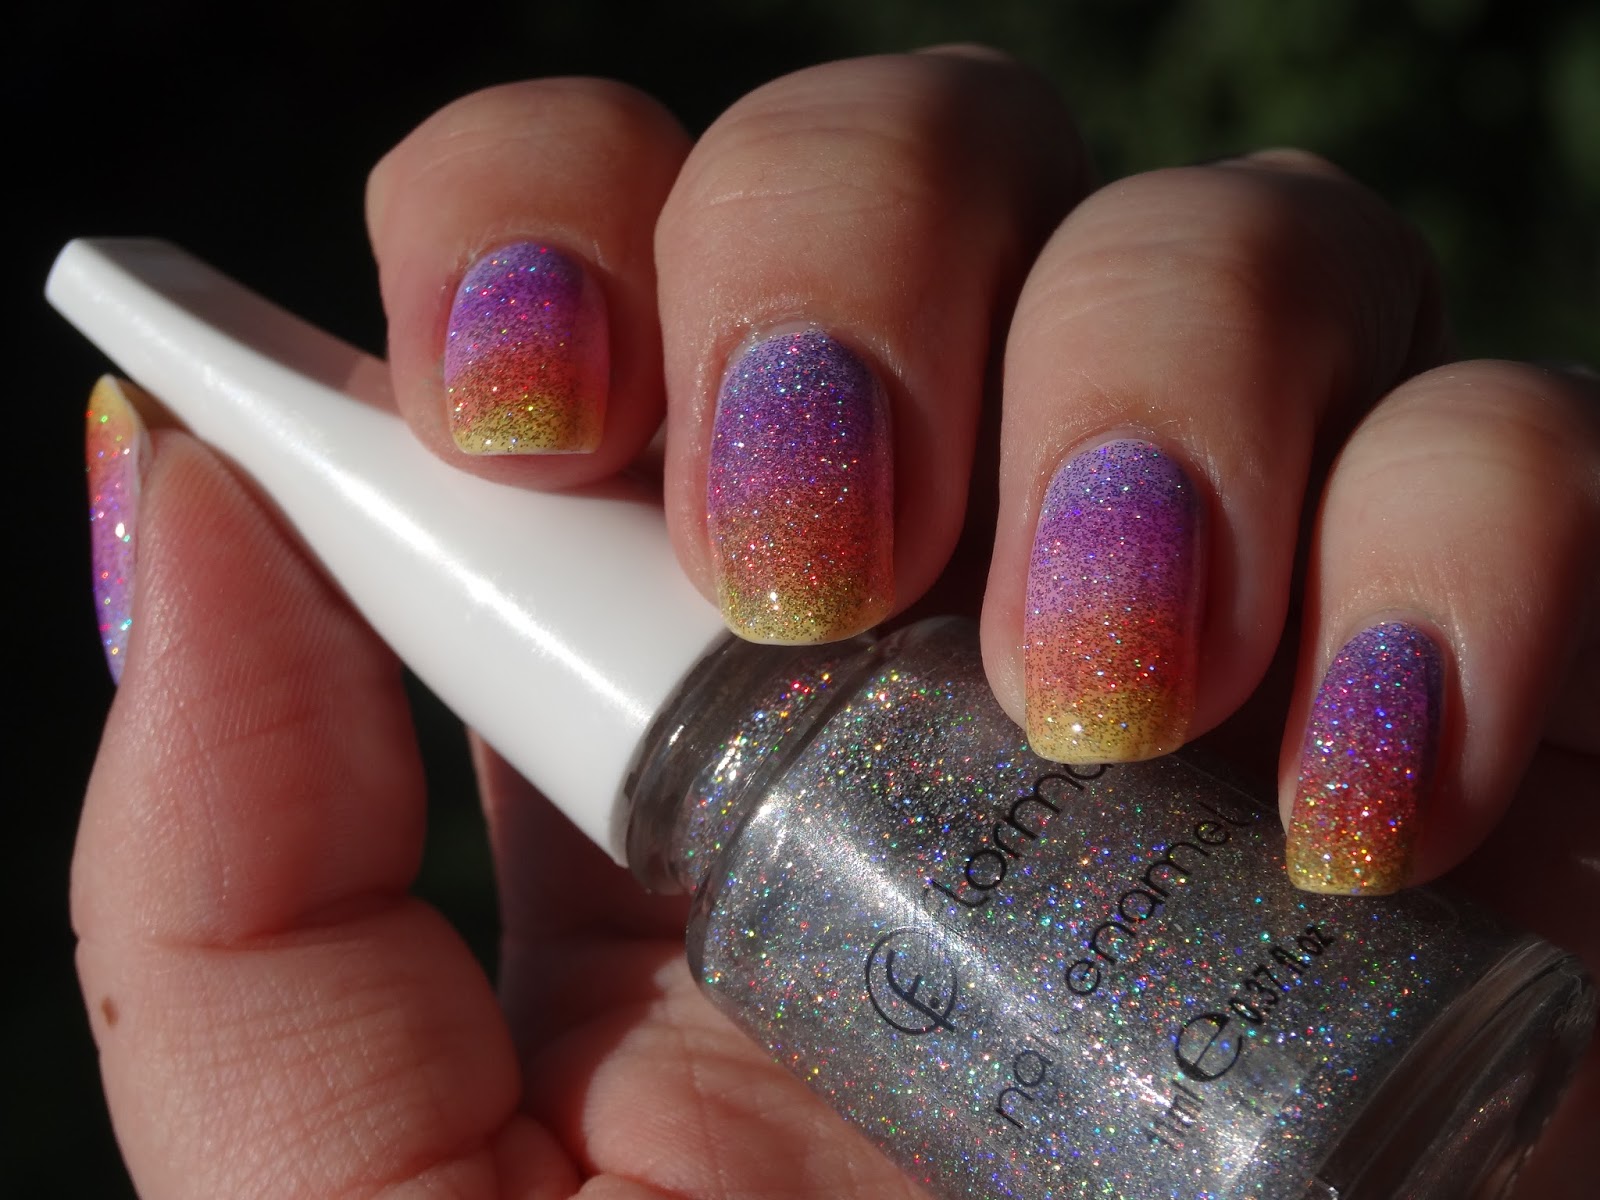
After applying base coat (I recently switched to a Wet 'n Wild product) I painted my nails white using two coats of claire's - Cloud and layered one coat of flormar - Holographic Silver (392) over it. (They are both from my Berlin Haul and will also be shown separately.)
For the gradient I used three shades of the OPI sheer tints collection. Don't Violet Me Down, Be Magentale with Me, I'm Never Amberressed. I applied the purple to approximately one third of my nails and then went over it with the pink, overlapping about half of it. Tor the tips I used the yellow tint and also covered part of the pink to get an orange shade.
This is a super easy way to do a gradient and you don't need any special tools. Just make sure to let every layer dry for a bit before painting over or it might end up looking gooey. On my pinkie I tried to add some more sparkle and added another layer of glitter over the gradient but that was a bit too much. So I quickly went over it again with colour before covering my nails with top coat. That's why it looks a bit darker then the rest.


I am totally in love with this manicure. It is so wonderfully sparkly and colourful. I could not stop moving my fingers and looking at all the iridescent sparkles.
In sunlight it looked even better. Super shiny and twinkling. Here are some more pictures for you:


Have you ever done a gradient with jelly polishes? How do you like this manicure?

You may also like:

Sonntag, 30. August 2015

Rival de Loop - GEL-like perfect Look - lady look

Happy Sunday Beauties!

Today I would like to share another of my newbies with you. This is Rival de Loop - perfect Look GEL-like - lady look (05). I am not too familiar with the RdL polishes, but I think the GEL-like line is relatively new.
For this beautiful, hot summer day I chose to show you this gorgeous hot pink. It has a great formula and was super easy to apply. The brush spread out widely and still allowed very accurate brushstrokes. I didn't have to clean anything up at all. And lady look is extremely glossy. This is two coats with no top coat and look how shiny it is!

The colour is a fuchsia pink with a hint of red, that is only visible in certain lighting. I usually am not the biggest fan of a full set of pink nails (baby pink is the worst for me), but this polish is wonderful and I would wear it like this anytime.


But as I am still trying out my new polishes I decided to add a little sparkle to the tips of my nails with RdL Young Glitter Nails - million diamonds (#04). I tried to paint freehand french tips. With the first coat they looked really sweet, but I wasn't quite happy with the coverage so I added a second layer wich made the tips look totally gooey and thick. I liked it better without the tips.

But the glitterpolish itself looks amazing. it has a clear shimmering jelly base that shifts from a blueish purple to pink and is packed full of small and medium sized hexagonal silver glitter. I have to use million diamonds again soon. I bet this would make a great manicure in combination with black.
What do you think of this manicure? Do you like the glitter tios, or do you prefer the pink on its own? Is this a shade of pink you would wear too?

You may also like:

Freitag, 28. August 2015

claire's - Neon Polishes & Advanced Stamping Accent

Hello Lovelies!


And a very Happy Friday! Today I want to show you a summer manicure that is perfect for the hot and sunny weather we are having again right now. For this manicure I used only polishes I bought in Berlin and shared with you yesterday (Day 2), plus a black stamping polish.
First let me show you how I created my accent nail: I used the advanced stamping technique wich means that you transfer a pattern to your stamper and then fill it out with your desired colours. Once that is dry you paint on a topcoat and peel it of 30 minutes later (or the next day. Just make sure everything is dry!) I also included a layer of white to make the neon polishes stand out even better. But I would not recommend doing that. It is better to paint your nail white before placing the decal on. In my opinion this makes the cleanup easier and prevents white borders.


Once you placed the decal on your nail in the right position press down gently and remove any excess. You can cut it down with a pair of scissors or remove it with acetone or polish remover. What I like to do is to press down against the side walls of my fingers with an orange stick and break off the excess. This only works with a very well dried decal so be patient! :-)
Once you're finished with cleaning everything up seal in your decal with top coat. Don't use too many brushstrokes or you might smudge your beautiful design. I used Seche Vite Dry Fast Top Coat wich in my opinion is the best top coat ever. It gives a wonderful glossy finish and dries rapidly. It also almost never smudges a design.


I painted my other nails with different neon shades. On my thumb I used the orange Stormy Day, on my pointer Cobalt. The pink on my middlefinger is called Rave and the green polish on my pinkie is Pinball. All the polishes required three coats to be opaque. The formulas were all very similar and very good. I had no trouble with the application and they dried fast.


For my decal I also used the other neon shades I purchased. The yellow California Girl and the purple Electric. Furthermore I used an apricot neon shade by the name Pastel Neons. I bought this one a day later so you will see it in part 3 of my Berlin series.
I topped off all of my nails with Seche Vite. I really love how this manicure turned out. I was not sure that I liked neon polish on my nails, but this manicure proofed me wrong. Maybe a full set of neon in one colour would be too much, but this way it is perfect for me.
I also love how the polish seems to be glowing in direct sunlight. The colours look so intense and are just beautiful to look at. On the polish bottles it says 'fluorescent'. I am not sure if that means they'd glow under a black light. Do you have any experience in that department?
Have a great weekend everyone and enjoy the sun! I sure will.
How do you like this neon summer manicure? Would you wear it like this or do you prefer in in one colour?

Oh, I almost forgot to mention wich stamping plate I used. It is the BP-31 plate from my Born Pretty Store Haul. I do have quite a selection of stamping plates but only a few of them have such great full nail patterns. I definitely have to get more of those! Any suggestions?
You may also like: