Posts mit dem Label OPI werden angezeigt. Alle Posts anzeigen

Donnerstag, 10. September 2015

Butterfly Stamping

Hello Sweeties!

Today I want to share a quick "recycled" manicure with you. A few days ago I showed you the gradient manicure using OPI sheer tints. I decided to make it a bit more girlie and added some stamped accents.
On my ringfinger I added a little fairy. Isn't she cute and elegant? And on my thumb a bunch of butterflies. I love how well they go with the sparkly gradient. And they look a bit like thay are floating, because I added them after I already had topcoat on. it is pretty much the same effect like in a Jelly Sandwich and the sheer tints intensify that and add even more depth.
This is the plate I used: Sorry for the bad lighting.

How do you like this manicure? Is this something you would wear too?

You may also like:

Dienstag, 8. September 2015

Leadlight Flowers - Stained Glass

Hello Sweeties!

Today I want to show you a manicure I've been wanting to do for a while now. I've seen so many gorgeous designs online and finally got to trying out the Leadlight or Stained Glass technique myself. Previously that had fallen through because I didn't find a proper stamping motive to use, but now I am quite happy with my choice.
I started this manicure with a layer of Wet 'n Wild Protective Basecoat and one coat of claire's - Cloud. I then applied two coats of flormar - Holographic Silver (395). Let me show you some swatches of that beauty before heading to the manicure.


Holographic Silver is a fantastic glitter polish packed with lots and lots of iridescent microglitter. It reminds me of china glaze - Fairy Dust, just more dense. As you can see it is almost opaque in two layers. I Bet it would look amazing over a dark blue or black too!

In my opionion the name is a bit misleading. It is not really a holographic glitter, but an iridescent one. Even though it shimmers beautifully in all the colours of the rainbow it is still missing the real holo effect. Nevertheless it is insanely gorgeous. Look at all the sparkles:
I purchased a set of twelve stampingplates online a while back. You've seen me using some of them before. I really don't know what brand it is so I can only show it too ou and tell you I've used number 10 for this manicure.
With black stamping polish I transferred the flower design in the lower left corner to all of my nails. Look how you can still see all the lovely glitter!

Once that was dry I started filling in the design with various jelly polishes. I've used most of the OPI sheer tints and some homemade jellies in green, orange and red (wich appears quite pink). I then sealed it in with Seche Vite.
In the pictures you can see, that the orange jelly I mixed was a bit milky and stained my black polish a little, but in real life that was only minimal and hardly visible. It also was a lot sparklier than it appears in the pictures. I had trouble looking away from my nails. In the brurry parts of my last picture you can get a glimpse of it (Pointer).
I am so happy I finally tried this technique. It is so simple yet elegant and super effective and doesn't take hours of prep time. I am a little bit disappointed with the pictures though and my poor choice of orange polish to mix my jelly ( I think I've used Maybelline - Couture Orange.). I bet I have better ones in my stock! I'll know better next time...

How do you like this manicure? Have you ever used the leadlight technique?

You may also like:

Samstag, 5. September 2015

Watermelon / Wet 'n Wild - SaGreena the Teenage Witch

Hello Lovelies!

Happy Saturday. Anything special planned today? I still am pretty much chained to the sofa. My foot still hurts and I can only walk on my toes wich looks actually quite funny (if it didn't hurt so much...).
Today I want to show you a manicure I did last week while it was still extremely hot, but even though autumn is slowly finding it's way back and it is getting cooler I still want to share this summer manicure with you.
The green I used for this manicure is Wet 'n Wild - SaGreena the Teenage Witch (E226C). It is a luscious emerald green with a soft metallic finish. The formula is excellent and leaves only very little visible brushstrokes. I used three coats for full opacity, wich dried very quick and were super easy to apply. 
For my accent nails I used this stamping plate (sadly I don't know a make and model. It's simply called 05). I transferred the watermelon design in the left cormer to my stampers and coloured it with SaGreena the Teenage Witch and OPI - Dinner At Sunset. I also added a little bit of Wet 'n Wild - Blazed to the tips of the slices.
I added a clear coat and let that dry before I peeled it off to place it on my nailes that I covered with two coats of claire's - Cloud. After trimming off the excess I added top coat to my nails.


I did have a few melon slices "leftovers" that I decided to add to my green nails to make this manicure perfect. I think it looks delicious and absolutely mouth-watering. I could really take a bite right now! :-D


I like the watermelon design a lot, but the pattern didn't transper perfectly. The seeds are so tiny they dry extremely fast and it is nearly impossible to get them all transferred perfectly. That is the only thing I don't like about it, so let's just say I stamped on seedless melons! :-D
How do you like this fruity manicure? Isn't this a lovely green?

My friend Andrea from Colour Your Life suggested that I should use bigger pictures for my posts. So this is what I did here. Please give me some feedback and let me know how you like the new picture size. Should I stick with it for the future, or should I try it one step smaller?
Have a wonderful weekend!

You may also like:

Freitag, 4. September 2015

OPI sheer tints Gradient

Hello Beauties!

How was your week? I had a good one. My brother came to visit and we had a good time. I really enjoyed having him and his girlfriend around. Unfortunately I hurt my ankle yesterday. I missed a little step and twisted my foot. Now I can barely step on it so I am sitting on the sofa with a big pillow underneath my leg... Perfect timing for the weekend! :-(
Nevertheless I have a super easy and gorgeous manicure to share with you. Let me show you how I did it.
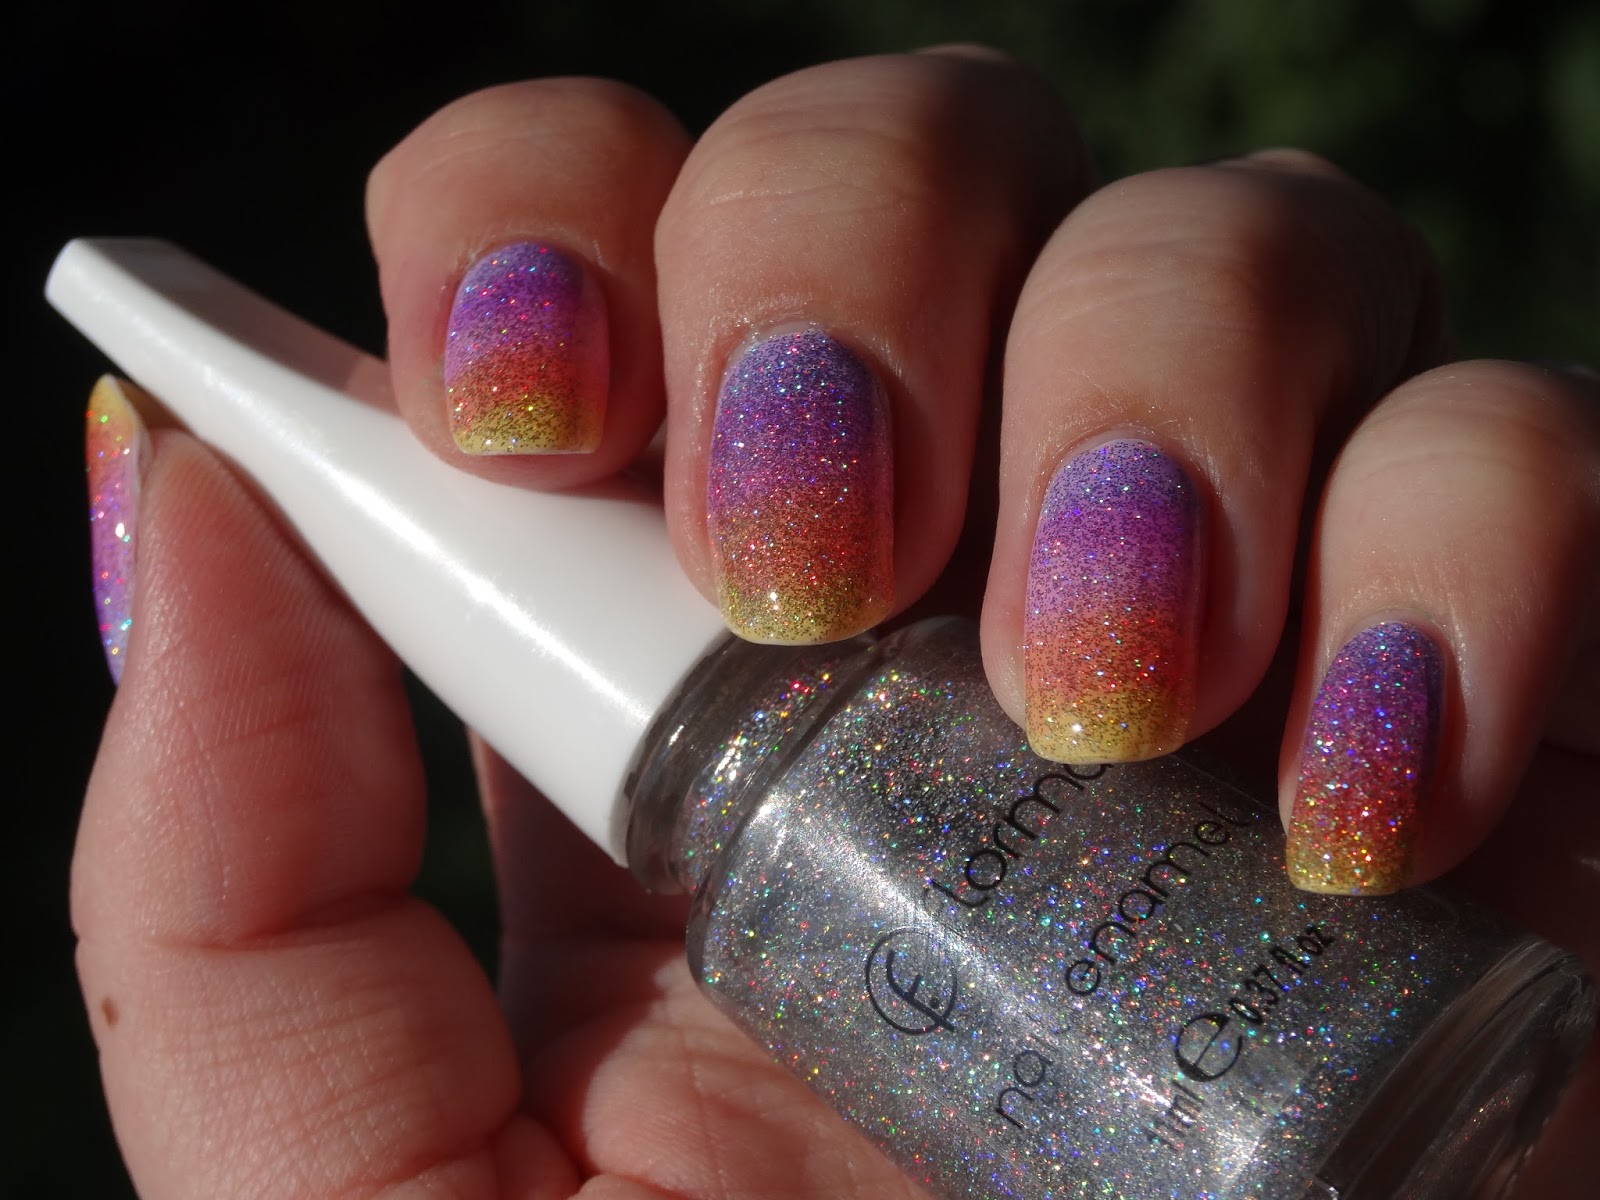
After applying base coat (I recently switched to a Wet 'n Wild product) I painted my nails white using two coats of claire's - Cloud and layered one coat of flormar - Holographic Silver (392) over it. (They are both from my Berlin Haul and will also be shown separately.)
For the gradient I used three shades of the OPI sheer tints collection. Don't Violet Me Down, Be Magentale with Me, I'm Never Amberressed. I applied the purple to approximately one third of my nails and then went over it with the pink, overlapping about half of it. Tor the tips I used the yellow tint and also covered part of the pink to get an orange shade.
This is a super easy way to do a gradient and you don't need any special tools. Just make sure to let every layer dry for a bit before painting over or it might end up looking gooey. On my pinkie I tried to add some more sparkle and added another layer of glitter over the gradient but that was a bit too much. So I quickly went over it again with colour before covering my nails with top coat. That's why it looks a bit darker then the rest.


I am totally in love with this manicure. It is so wonderfully sparkly and colourful. I could not stop moving my fingers and looking at all the iridescent sparkles.
In sunlight it looked even better. Super shiny and twinkling. Here are some more pictures for you:


Have you ever done a gradient with jelly polishes? How do you like this manicure?

You may also like:

Sonntag, 19. Juli 2015

OPI - Color Paints & Brushstroke Mani

Hello Lovelies!

Happy Sunday! How is your weekend going so far? I am enjoying the warm weather and also the thunderstorms that bring a bit of chilling most nights these days. I recently purchased the new OPI Color Paints and hat to try them immediately.

The mini set contains the silver base polish and five of the eight available colours:
Silver Canvas Undercoat: A clean-slate silver to illuminate your masterpiece.
Primarily Yellow: Paint some sunshine with this glowing yellow.
Chromatic Orange: This freshly squeezed orange is awash with color.
Pen & Pink: I'm irresistibly drawn to this rosy pink.
Purple Perspective: The depth of this purple is mesmerizing.
Turquoise Aesthetic: Beauty is in the eye of this deep aqua.
First I applied the silver canvas. One coat was enough to get good coverage and it spread smoothly. This metallic silver shows a few brushstrokes, but since it is the base colour that didn't bother me at all.


Then I tried out the colours and did kind  of a skittle manicure with them, because I couldn't wait to see them all.


After the first coat the colours look very shiny and a bit metallic, because the silver is still visible. I really like them this way, but I did apply a second layer. 
With two coats the colours are more intense. The lighter shades didn't change much except for the fact that the silver shine is mostly gone. The two darker shades get very intense and deep. Especially the purple is very dark with two coats. 
Depending on how you want to use it, both - one and two coats - are fantastic. I decided to try a brushstroke manicure on top of the skittle manicure to see how the colours look combined. On the darker colours it is not very well visible, but with the lighter shades as background colours I like it!


And it is so much fun to do a brushstroke mani. You just wipe off any excess polish from your brush and drag it across your nails. Repeat with all desired colours until you are happy and your done.
Have you tried the new Color Paints yet? I need to experiment with them a bit more.

You may also like: