Posts mit dem Label yellow werden angezeigt. Alle Posts anzeigen

Dienstag, 6. Oktober 2015

Apricot Gradient & Desert Stamping

Hello Sweeties!

How are you today? I am sitting at my desk right now, looking outside at the beautiful trees that are changing their colour, a blue sky with some little white clouds and listening to the birds singing their songs. My cup of tea smells fantastic and I am happy to be typing again. So here is todays post. The apricot colours I used are lovely for spring and summer, but I also think they are gorgeous for a sunny autumn day like today.
I painted my nails with one coat of Rival de Loop - pastel look and then sponged on a gradient using pastel look (02) and sunny look (03). Without a topcoat it looks a bit gritty, but after I layered over some Fairy Dust from china glaze I really liked the result a lot.

The top coat always helps bringing together the colours and blends them to a wonderful gradient. The pastel apricot and the peachy shade look lovely as a gradient, don't you think?
I then decided to use my Born Pretty Store stamping plate BP-31 to do a little stamping on my nails, but first I created two accent nails, that reminded me of sand and totally underlined the egyptian theme I was planning to do. I removed the polish from my middle and index finger, applied a white base and used the golden/apricot holo polish #6 from my BPS Holographics Set.
To get the colourful design I used multiple stamping polishes that I all bought from Born Pretty Store recently. (Check out the full haul.) For the palm trees I mixed together some black, green and a bit of yellow as well as a metallic green stamping polish. My camel is yellow with some white and the pyramides are black with a touch of yellow, wich looks like there is sand sprinkled all over them.
I am super happy with my manicure. Only my middle finger is a disappointment. I waited quite some time before stamping and still the polish got smudged horribly. I still wanted to share it with you, because I think the colourful design is very cute and I wanted you to see the beautiful motives from the BP-31 plate I haven't used before. I actually bought this plate for the full nail designs in the middle, but as it turns out the otheres are wonderful too!
And here is one last look at my thumb nail. Here you can see the metallic green stamping polish I used. It looks a bit blue in this picture, but it's not. It actually has a lovely golden shimmer. When you remove the polish and swipe over with a cotton ball, the green colour vanishes first and leaves the golden paticles behind and you can still see your design. I will show you this stamping polish in a separate post. It is totally worthy of that!
How do you like my egyptian stamping design?

You may also like:

Sonntag, 20. September 2015

Dandelion Stamping on essie - Avenue Maintain

Hello Sweeties!

I hope you're having a fabulous Sunday! Today I want to show you a simple stamping manicure, that I did a while back when I first swatched essie - Avenue Maintain.


I used the design from my #10 stamping plate and some white stamping polish to create this dandelion design. It looks like one of these blowballs that I had so much fun with when I was a kid. I loved plucking them, blowing in and watching the seeds fly away with the wind. Did you do that too?
To give my design a little more colour I added some yellow dots with Wet 'n Wild - Sunny Side Up to the center of each flower. I like those little flowers a lot, but unfortunately the polish didn't transfer too well on my ringfinger. I still think it's cute!
How do you like this manicure? Do you like stamping on short nails?

You may also like:

Dienstag, 15. September 2015

trend IT UP - Holo Dimension 040 & Autumn Leaves

Hello Sweeties!

Happy Tuesday! How are you today? Finally I am back with a manicure I did recently. This one is actually from last week and I thought I was getting prepared for autumn by doing a Leave Manicure.
First let me show you the polish I used as a base for this manicure. It is one from a brand I've never tried before because it is new. It is called trend IT UP and is a drugstorebrand from dm. (dm is my favourite drugstore and actually is short for Drogerie Markt the german word for drugstore.) I think I already posted a link when I showed you my Berlin haul.
So this is 040 from their Holo Dimension line. 040 is a golden crelly polish with beautiful shimmery flakies in it. I wouldn't say it is a holographic polish, but it is mesmerizing and will have you look at it all the time. 
Even though the golden base colour is really pretty the most amazing thing about this polish is how the colour shifts from a green to a coppery red shimmer with hints of blue in between. I could not capture all of its beauty on camera, but you can see the copper tone in the picture below and some green in the bottle shot above.
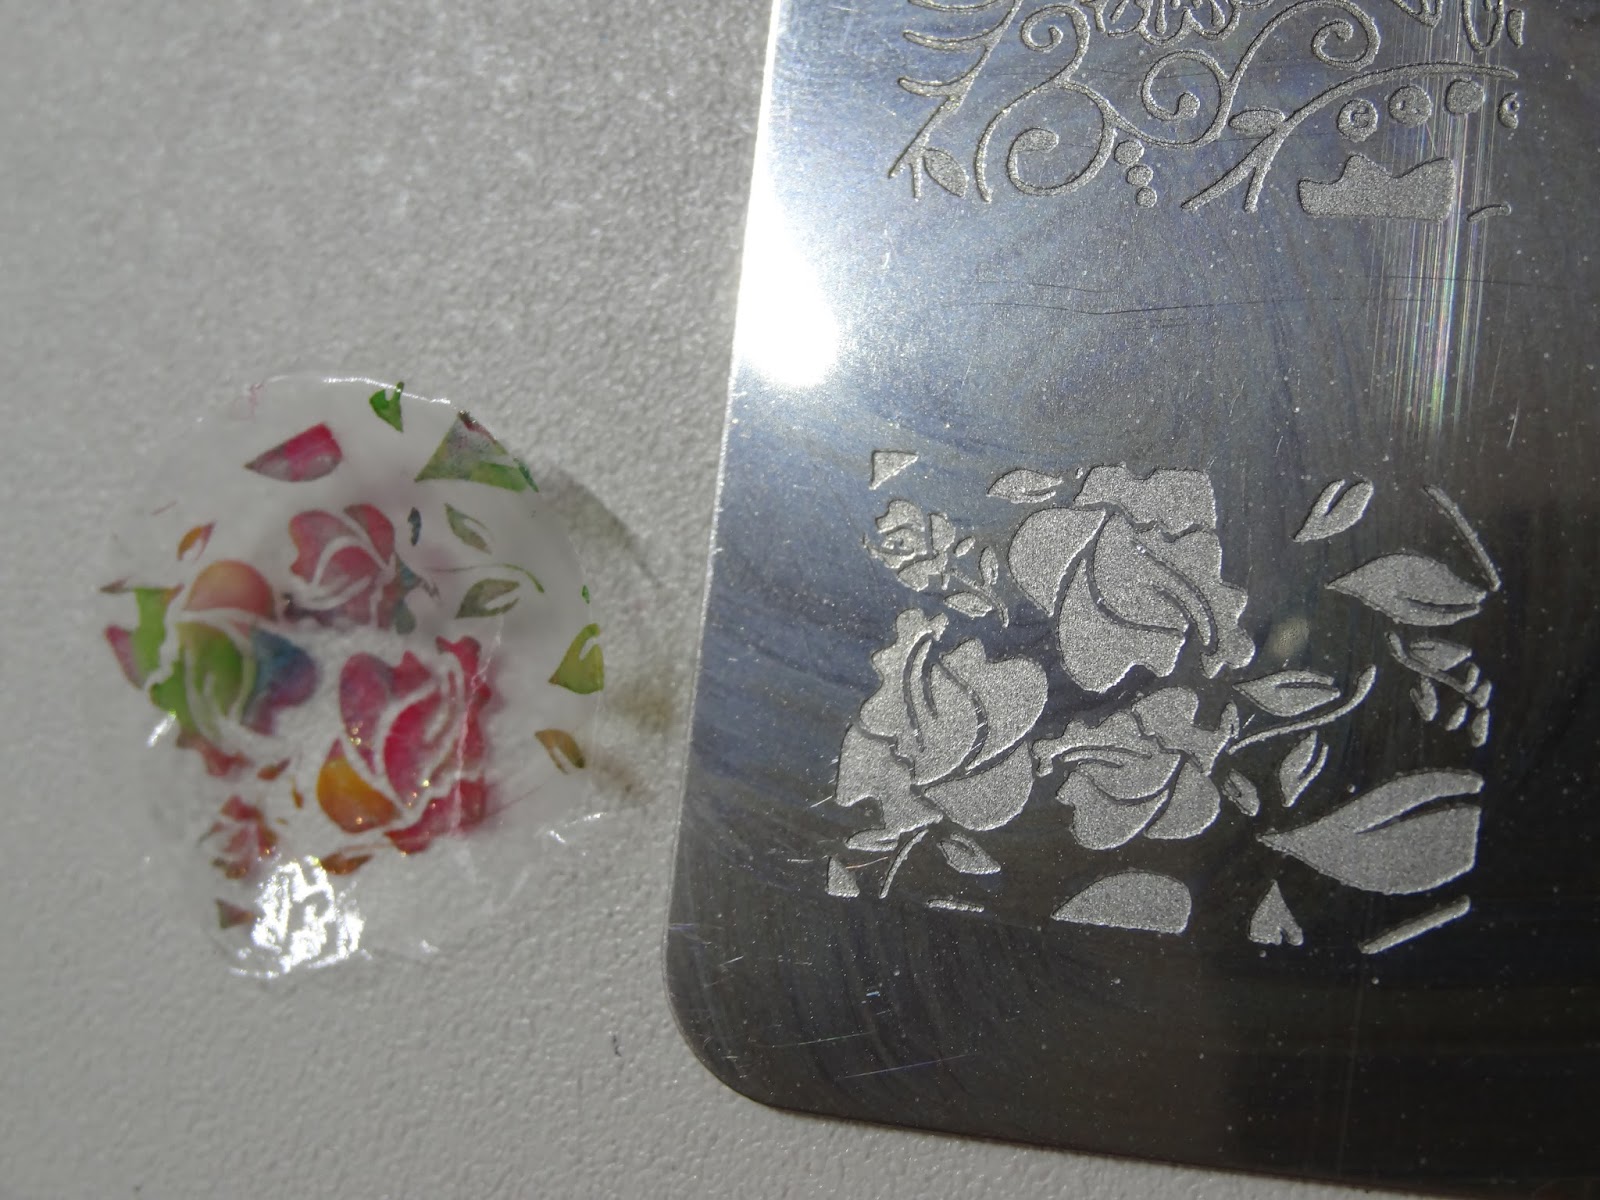
I then decided to use different colours of stamping polish that I got in my Born Pretty Store Haul and add a leave design to my nails to give them the autumn look. I first tried making a decal as you can see below, but I ended up with simply stamping directly on my nails wich worked perfectly.
As you can see I used some red and yellow as well as a light and a darker green polish to stamp on my nails. I just applied a few drops of each colour to the pattern and scraped over it a few times. Not too often though or it would all end up in a brown mixture.
I finally sealed them in with Seche Vite to protect my design. I ended up wearing this manicure for four full days with only minor tipwear. The Holo Dimension polish really amazes me. They really did a great job with this new line. I love the formula and the durability.
As far as I'm concerned it's time for fall to come! I love it when the leaves are changing colour.
Are you ready for autumn to arrive? Have you done some fall manicures?
How do you like my stamped leaves?

You may also like:

Freitag, 4. September 2015

OPI sheer tints Gradient

Hello Beauties!

How was your week? I had a good one. My brother came to visit and we had a good time. I really enjoyed having him and his girlfriend around. Unfortunately I hurt my ankle yesterday. I missed a little step and twisted my foot. Now I can barely step on it so I am sitting on the sofa with a big pillow underneath my leg... Perfect timing for the weekend! :-(
Nevertheless I have a super easy and gorgeous manicure to share with you. Let me show you how I did it.
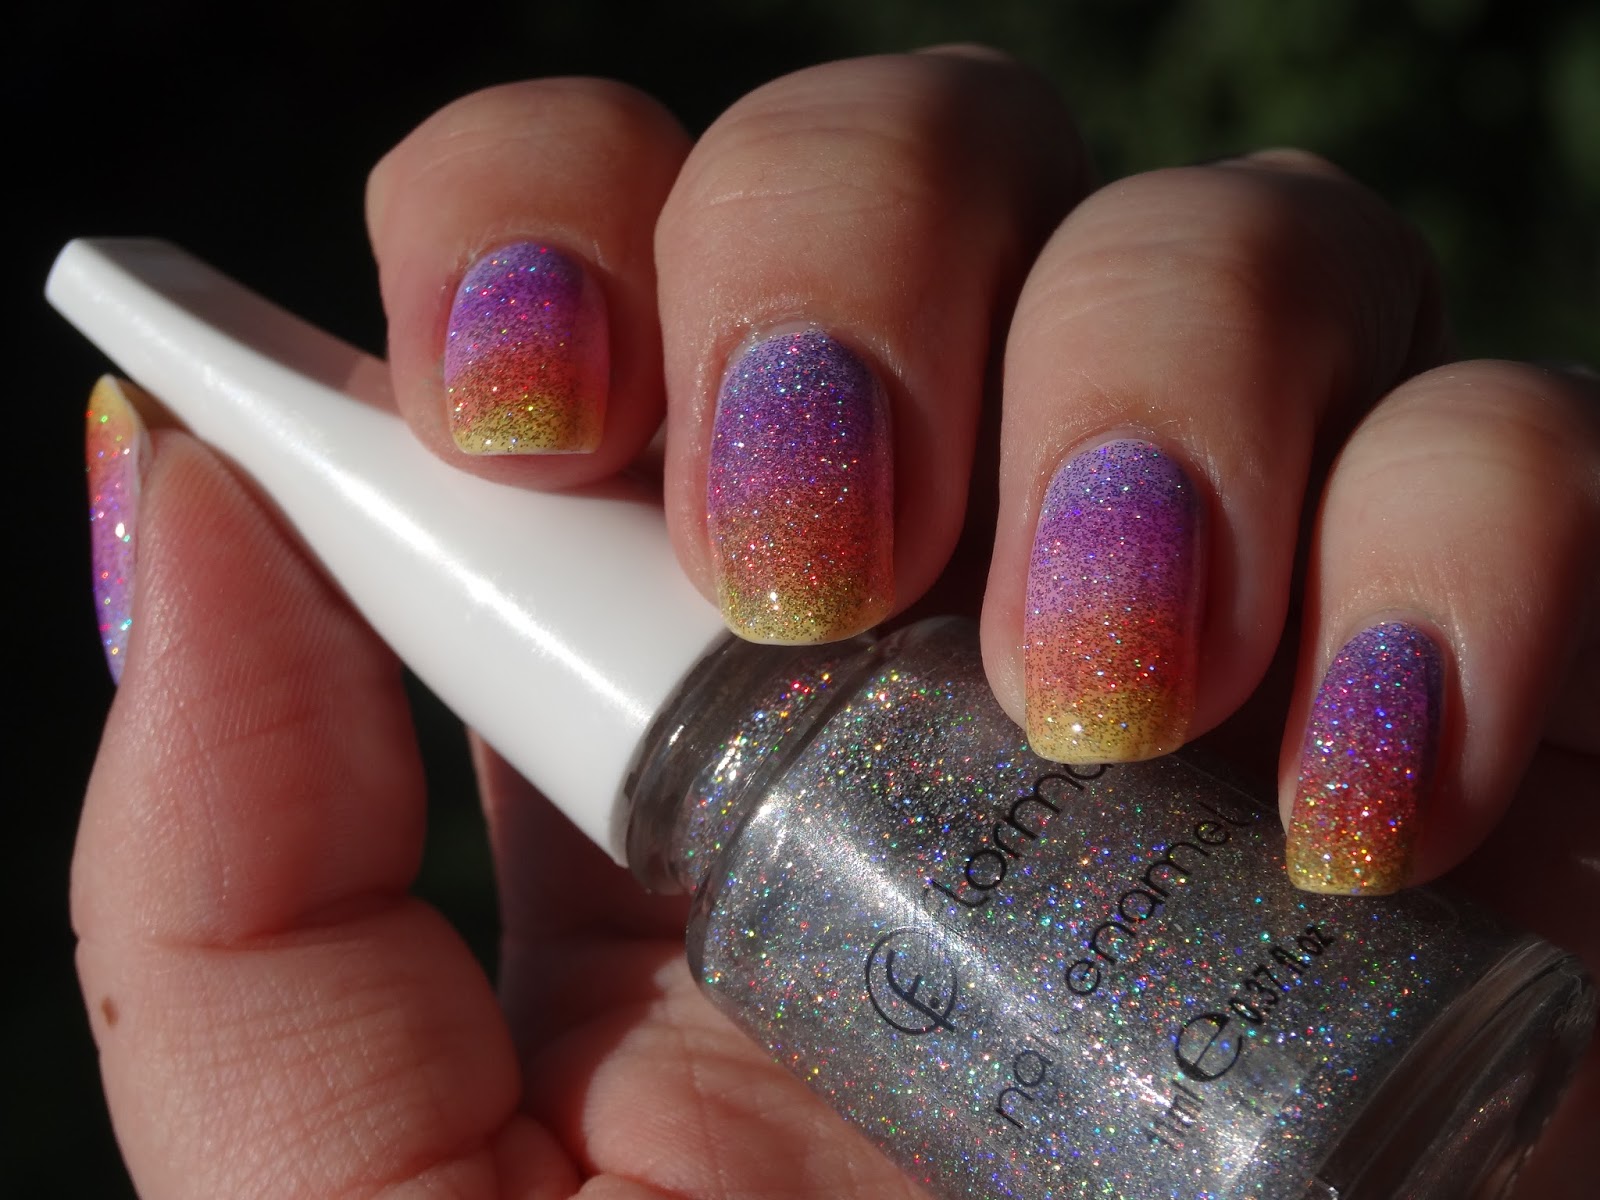
After applying base coat (I recently switched to a Wet 'n Wild product) I painted my nails white using two coats of claire's - Cloud and layered one coat of flormar - Holographic Silver (392) over it. (They are both from my Berlin Haul and will also be shown separately.)
For the gradient I used three shades of the OPI sheer tints collection. Don't Violet Me Down, Be Magentale with Me, I'm Never Amberressed. I applied the purple to approximately one third of my nails and then went over it with the pink, overlapping about half of it. Tor the tips I used the yellow tint and also covered part of the pink to get an orange shade.
This is a super easy way to do a gradient and you don't need any special tools. Just make sure to let every layer dry for a bit before painting over or it might end up looking gooey. On my pinkie I tried to add some more sparkle and added another layer of glitter over the gradient but that was a bit too much. So I quickly went over it again with colour before covering my nails with top coat. That's why it looks a bit darker then the rest.


I am totally in love with this manicure. It is so wonderfully sparkly and colourful. I could not stop moving my fingers and looking at all the iridescent sparkles.
In sunlight it looked even better. Super shiny and twinkling. Here are some more pictures for you:


Have you ever done a gradient with jelly polishes? How do you like this manicure?

You may also like:

Montag, 31. August 2015

Summer Flowers

Hello Sweeties!

How was your weekend? To make your Monday a bit sweeter let me show you this colourful flower manicure. It took me quite a while to do it, but I think it was totally worth the effort.

Unfortunately I only have two of these stampers so I wasn't able to make the decals for all my nails at once. I transfered a mixed flower design on both ends of my stapmers and filled them in with different colours. I used all catrice polishes, but I did not write each one of them down. (I think I used about 10 or 12 different shades from yellow to purple.) Last but not least I added a few dotted purple lines to fill in some gaps.
Once that had dried for a few minutes I painted on a clear coat and let it sit there for the night. The next day I peeled them off and did the same thing again. While the second batch was drying I painted my nails white (catrice - Isle of White).
I then started to measure the first decals to my nails (I had four for five nails!) and cut them into shape. Once I've placed them on my nails and cleaned up any excess I sealed them in with Seche Vite. By the time I was done with that the second decals had dried sufficiently and I repeated the last few steps on my other hand.
I usually don't post pictures of my right hand, because I am never 100% satisfied with the outcome, but in this case I'll make an exception. Don't they look super cute?
They also look lovely with my orchids...
I hope you had a wonderful weekend and are up for a whole new week. Stay tuned for my monthly favourites coming later today!

How do you like this colourful design? Do you like flower nails?

You may also like:

Freitag, 28. August 2015

claire's - Neon Polishes & Advanced Stamping Accent

Hello Lovelies!


And a very Happy Friday! Today I want to show you a summer manicure that is perfect for the hot and sunny weather we are having again right now. For this manicure I used only polishes I bought in Berlin and shared with you yesterday (Day 2), plus a black stamping polish.
First let me show you how I created my accent nail: I used the advanced stamping technique wich means that you transfer a pattern to your stamper and then fill it out with your desired colours. Once that is dry you paint on a topcoat and peel it of 30 minutes later (or the next day. Just make sure everything is dry!) I also included a layer of white to make the neon polishes stand out even better. But I would not recommend doing that. It is better to paint your nail white before placing the decal on. In my opinion this makes the cleanup easier and prevents white borders.


Once you placed the decal on your nail in the right position press down gently and remove any excess. You can cut it down with a pair of scissors or remove it with acetone or polish remover. What I like to do is to press down against the side walls of my fingers with an orange stick and break off the excess. This only works with a very well dried decal so be patient! :-)
Once you're finished with cleaning everything up seal in your decal with top coat. Don't use too many brushstrokes or you might smudge your beautiful design. I used Seche Vite Dry Fast Top Coat wich in my opinion is the best top coat ever. It gives a wonderful glossy finish and dries rapidly. It also almost never smudges a design.


I painted my other nails with different neon shades. On my thumb I used the orange Stormy Day, on my pointer Cobalt. The pink on my middlefinger is called Rave and the green polish on my pinkie is Pinball. All the polishes required three coats to be opaque. The formulas were all very similar and very good. I had no trouble with the application and they dried fast.


For my decal I also used the other neon shades I purchased. The yellow California Girl and the purple Electric. Furthermore I used an apricot neon shade by the name Pastel Neons. I bought this one a day later so you will see it in part 3 of my Berlin series.
I topped off all of my nails with Seche Vite. I really love how this manicure turned out. I was not sure that I liked neon polish on my nails, but this manicure proofed me wrong. Maybe a full set of neon in one colour would be too much, but this way it is perfect for me.
I also love how the polish seems to be glowing in direct sunlight. The colours look so intense and are just beautiful to look at. On the polish bottles it says 'fluorescent'. I am not sure if that means they'd glow under a black light. Do you have any experience in that department?
Have a great weekend everyone and enjoy the sun! I sure will.
How do you like this neon summer manicure? Would you wear it like this or do you prefer in in one colour?

Oh, I almost forgot to mention wich stamping plate I used. It is the BP-31 plate from my Born Pretty Store Haul. I do have quite a selection of stamping plates but only a few of them have such great full nail patterns. I definitely have to get more of those! Any suggestions?
You may also like: